Introduction
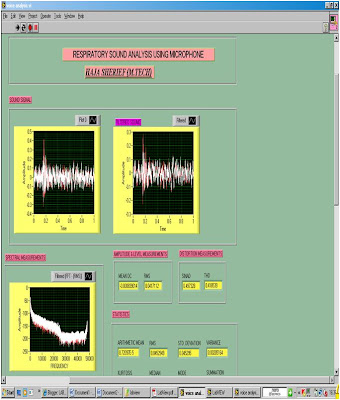
LabVIEW is short for Laboratory Virtual Instrument Engineering Workbench. It is a powerful software package for the programming and control of lab instruments, as well as a flexible instrumentation and analysis software system. Programs written in LabVIEW are known as virtual instruments (VIs). Virtual instruments have three main parts: a front panel, a block diagram, and an icon connector. The front panel is the interactive user interface of a VI, which resembles the front panel of an actual instrument. The front panel contains knobs, push buttons, graphs, and other controls (user inputs) and indicators (program outputs).
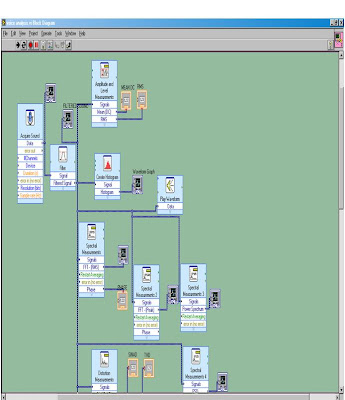
Each front panel is associated with a block diagram that can be thought of as the LabVIEW program. LabVIEW is similar to other software development systems with one significant difference. Other programming systems use text-based languages to create lines of code while LabVIEW uses a graphical programming language, called G, to create programs in block diagram form, eliminating syntactical details. In G, programs are formed by selecting blocks from available menus, setting their parameters, then connecting them or rewiring them.
FRONT PANEL OF LabVIEW PROGRAM
 BLOCK DIAGRAM OF LabVIEW PROGRAM
LabVIEW uses icons and graphical symbols rather than text to describe programming functions. LabVIEW has many libraries of functions and subroutines to accomplish almost any programming functions. It also has specific libraries for data acquisition, serial instrument control, data analysis, data presentation, and data storage. This includes functions for signal generation, signal processing, filters, windows, statistics, regression, linear algebra, and array arithmetic. Any computation possible in a conventional programming language is possible and usually simpler using the LabVIEW virtual instrument approach.
Panel Palette Descriptions
The palette is the row of icons on the top bar of the screen of a VI. We see these once we start running LabVIEW. The icons we use in this lab are:
1. Run Continuously Button (Looped Arrow) -Continuously runs the VI and allows for editing of controls while the VI is running.
2. Stop Button (Stop Signal) -Stops the VI from running.
Printing VIs
We will print out the VIs once we start with the experiments. This section might not make sense now, but it will when we start with the experiment. Refer back to this when you are asked to print out a VI.
1. Go to File>>Print on the front panel of the VI.
2. Highlight the VI name you want to print out from the Select VIs window. Click on "Next>".
3. Select "Using the panel" from the Print contents window. Click on "Print".
No comments:
Post a Comment